

Azure WebJobs
In this blog post we would like to show how to create an Azure WebJob with a Timer trigger to run some background processing using .NET Core 2.2 and WebJob SDK 3.x.
We at sandy energized analytics use Azure WebJobs to run several background processes to support our KI and machine learning services. We use them to trigger automated trainings based on a time schedule or read messages from queues or event hubs for further processing. Additionally, we use WebJobs for scheduling maintenance tasks and do health checks to our services.
The WebJob Project
In this blog post we use a very simple project setup which can be extended for your needs. To learn more about Azure WebJobs and available triggers please have a look at:
https://docs.microsoft.com/en-us/azure/app-service/webjobs-sdk-how-to#triggers
Project setup in Visual Studio 2019
To start development of an Azure WebJob, you need to create a new .NET Core Console Application.
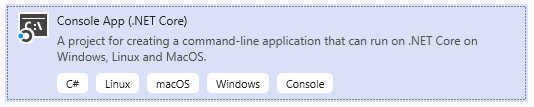
This template creates a simple console application containing only a Program.cs file with a small Main method.
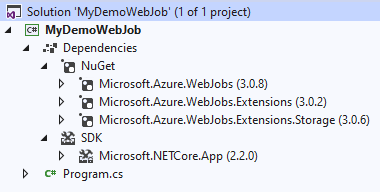
To make this project an Azure WebJob we need to add some additional NuGet packages. First we need the Microsoft.Azure.WebJobs package which is the base package of a WebJob and also the base namespace of all additional WebJob NuGet packages. To make use of the Timer trigger, we need to add the Microsoft.Azure.WebJobs.Extensions NuGet package. Because timer trigger use Azure Storage Accounts for synchronization and locking, we also need to add the Microsoft.Azure.WebJobs.Extensions.Storage NuGet package.
Now the Project shall have these dependencies:
Startup
The next step is to initialize the WebJob host system and add some basic configuration to make the WebJob running.
First, we need to add some configuration code to the main method of the project:
HostBuilder builder = new HostBuilder();
            builder.ConfigureWebJobs(b =>
            {
                b.AddAzureStorageCoreServices();
                b.AddAzureStorage();
                b.AddTimers();
            });
            IHost host = builder.Build();
            using (host)
            {
                host.Run();
            }
This is the very basic configuration to get the timer triggers to work, in real live you would do some additional configuration (e.g. for logging, etc.).
Next, we need to add an appsettings.json file with the basic configuration of the WebJob. This file contains the connection string of the storage account to use:
{
  "ConnectionStrings": {
    "AzureWebJobsStorage": "<<your Azure Storage Account connection string>>"
  }
}
The settings file appsettings.json needs to be marked as copy to output directory.
Triggers
To add some background processing code, we create a new file called Functions.cs. In that file we add some basic background processing code:
using Microsoft.Azure.WebJobs;
using System;
using System.Threading;
using System.Threading.Tasks;

namespace MyDemoWebJob
{
    public class Functions
    {
        // runs every 5 minutes and on startup
        public async Task MyTimerTriggerOperation([TimerTrigger("0 */5 * * * *", RunOnStartup = true)] TimerInfo timerInfo, CancellationToken cancellationToken)
        {
            // To some work...
            await Task.Delay(100, cancellationToken);

            Console.WriteLine("heavy work");
        }
    }
}
Make sure the class and method are public to be recognized by the WebJob SDK.
This implementation contains a timer triggered function which will be executed based on the given CRON expression (every 5 minutes) and on startup of the WebJob. The Cancellation token is injected by the WebJob SDK to support graceful shutdown implementation in case the WebJob needs to be stopped or restarted.
In a real live implementation, you should not use Console.WriteLine. Instead the dependency injection of .NET Core ILogger is supported in the WebJob SDK, if configured in the startup.
Local debugging
Now everything should be in place to hit F5 and start the local debugging. You might add a breakpoint in the timer trigger operation to see when it gets called.
Since the WebJob SDK ensures a single execution for timer triggers only one instance of the WebJob can claim a lock on the connected storage account. So, if you have already published this WebJob to Azure, you might notice that your debugging instance trigger is not fired if connected to the same storage account. To avoid this, ether use different storage accounts for your local development or use the Azure storage emulator for local debugging.
Publishing a WebJob to Azure
To Publish the WebJob to Azure we need to create an App Service to host that WebJob:
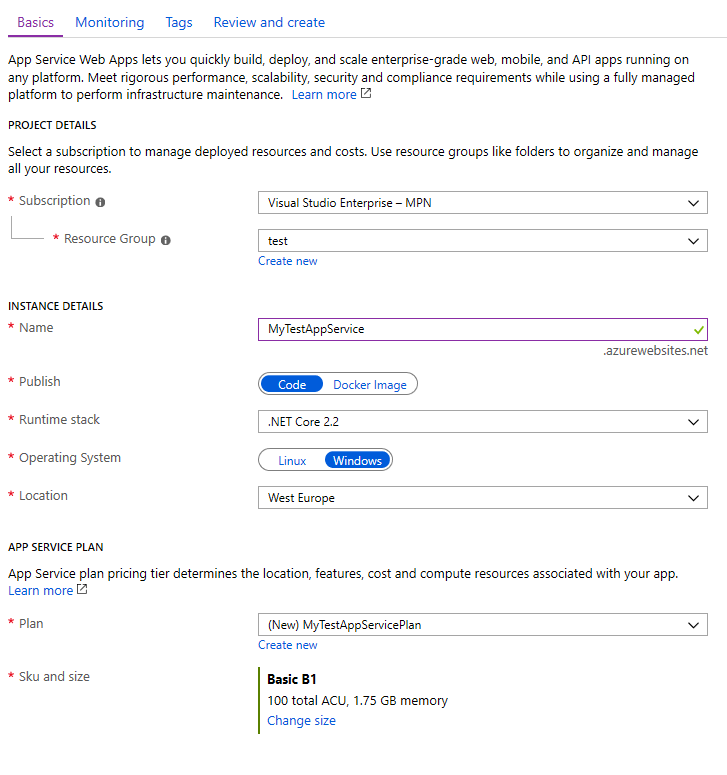
Make sure to choose an App Service Plan which supports “Always on” and switch this setting to “On” in the Configuration of your App Service. WebJobs are only executed if the hosting App Service is up and running.
Publish from Visual Studio
To publish the WebJob project to an Azure App Service, right click the WebJob project and select publish. This will bring up a publishing wizard where you can choose to publish to a new or already existing App Service:

In this dialog, click on “Create Profile” (instead of the preselected “Publish”). Then crate or choose the target App Service for publishing.
In the publishing profile configuration, you need to change the WebJob type from “Triggered” to “Continuous” because the triggering of the Function is handled by the WebJob SDK and not by the AppService. In this page you might also change the name of your WebJob.
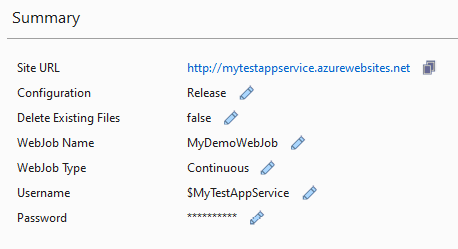
You should not enable “Delete Existing Files” if you have anything else than exactly one WebJob deployed to this App Service because this setting will affect all files published to the App Service and not only this specific WebJob.
If you are fine with these settings, hit “Publish” to transfer all required files to the Azure App Service.
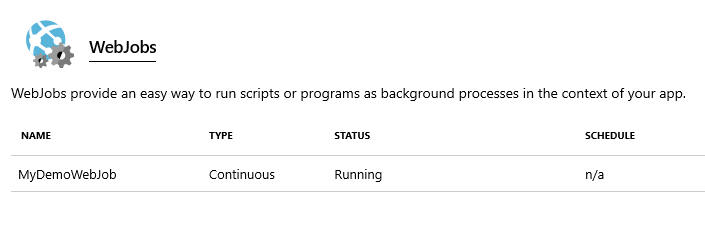
Once done and completed you should see a running continuous WebJob in the “WebJobs” section of your App Service.
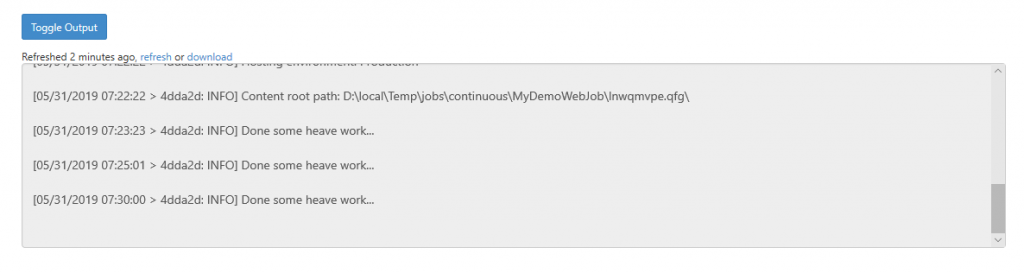
You might check the Logs of your WebJob on the App Service to see that it is executed as expected and you should see the console output written there like:
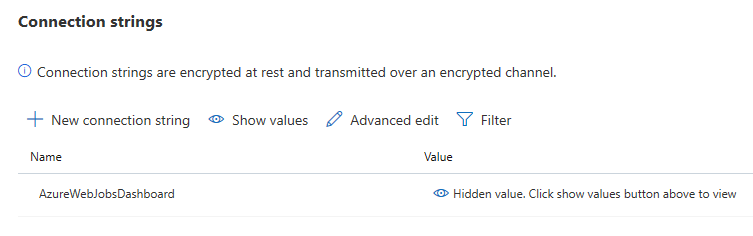
If you like to use the Azure WebJobs Dashboard (there might be some errors and warnings complaining about connection strings), you can add “AzureWebJobsDashboard” with the connection string to your storage account to the connection strings settings of the App Service:
Publish in Azure DevOps
To publish the WebJob using Azure DevOps we need to setup a build and a release pipeline. But before that we need to add one additional file to the project.
We need to create a “run.cmd” (UTF8 without BOM) with the following content:
dotnet MyDemoWebJob.dll %*
Because a .NET Core application is not an .exe file, it must be started with dotnet <your application>. The Visual Studio publishing process does this implicitly before copying all files to the Azure App Service. The App Service WebJob “runtime” is able to detect an executable “run.cmd” when published at the right location.
Make sure this file is also copied to the output directory.
In Azure DevOps we create a new build pipeline and configure the “Get sources” task according to your source control provider and project location.
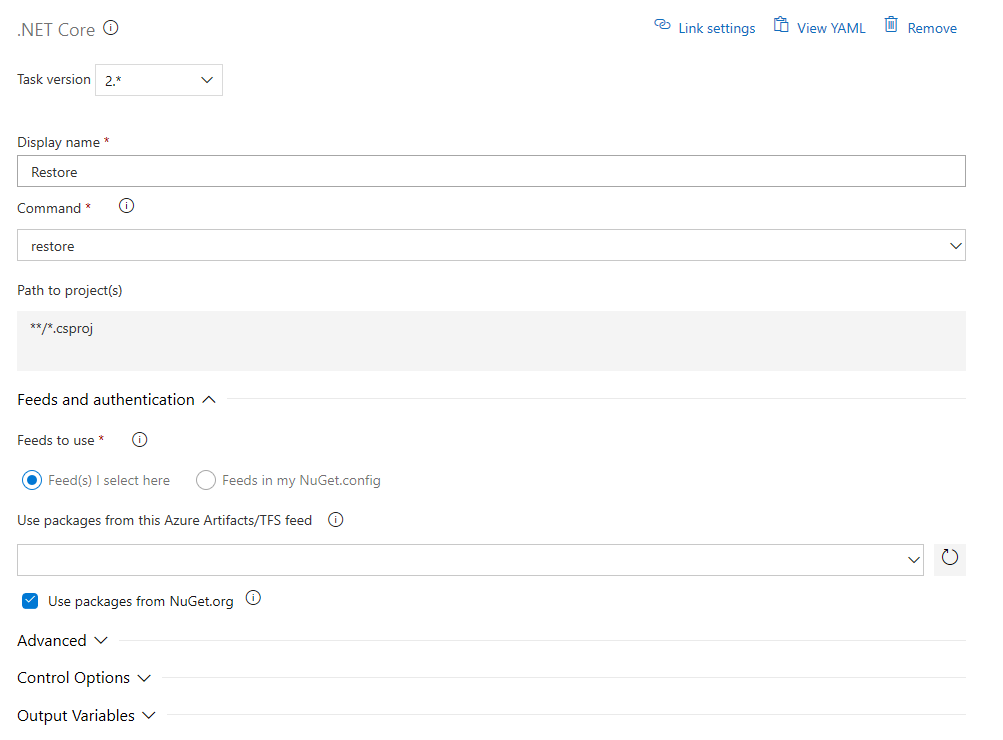
The first build task is a .NET Core task to restore all NuGet packages (all default values):
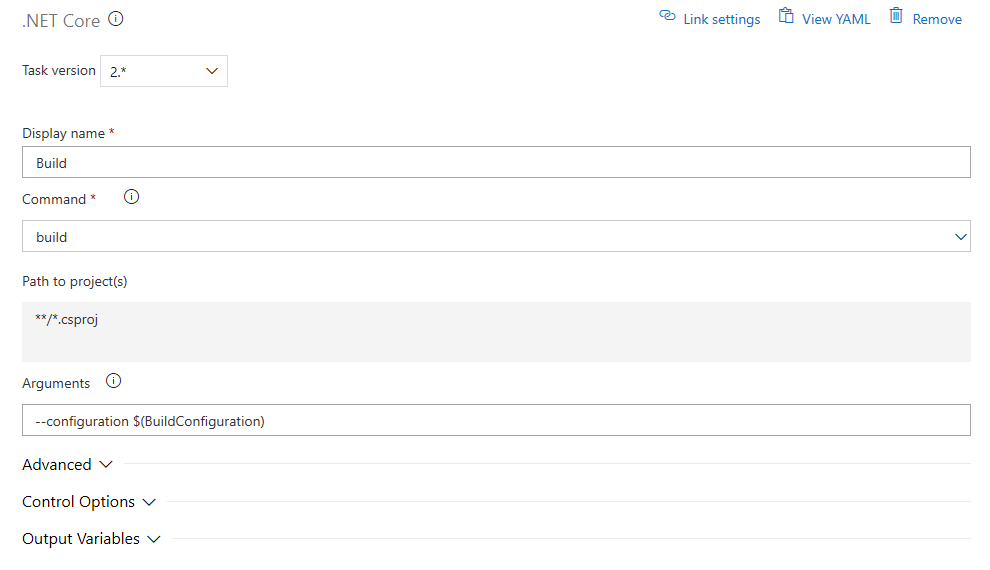
The second build task is another .NET Core task with default settings:
After that we need to publish the project using a .NET Core publish task:
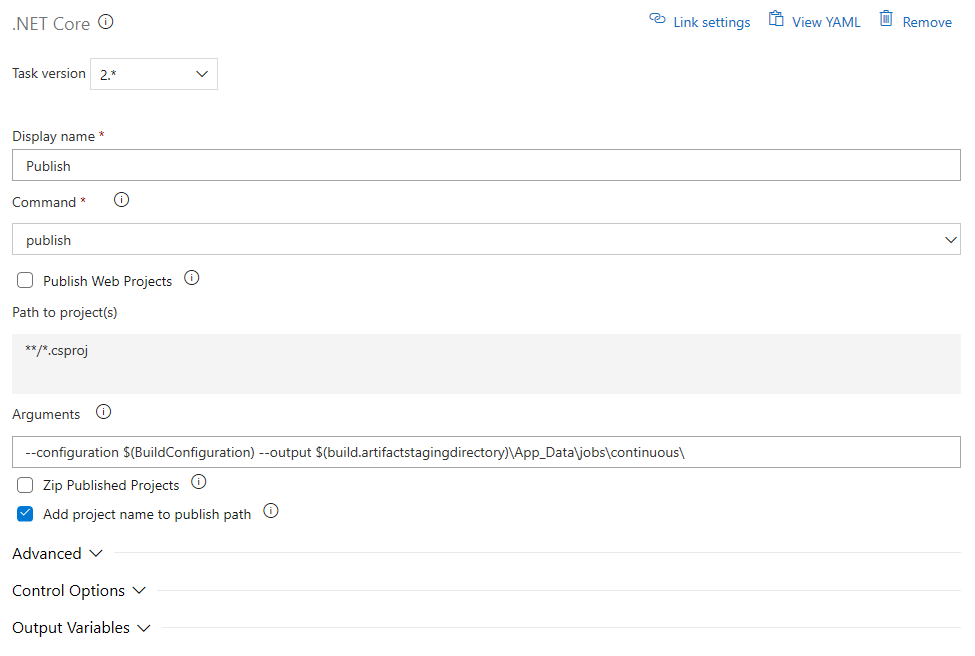
In this step it is important to uncheck the “Zip Published Projects” box and append the desired folder structures of a WebJob (\App_Data\jobs\continuous\). Since we keep “Add project name to publish path” checked, the publishing path will be \App_Data\jobs\continuous\MyDemoWebJob.
In the next step we use an Archive Files task to create a zip archive that we can use for web publishing in our release.
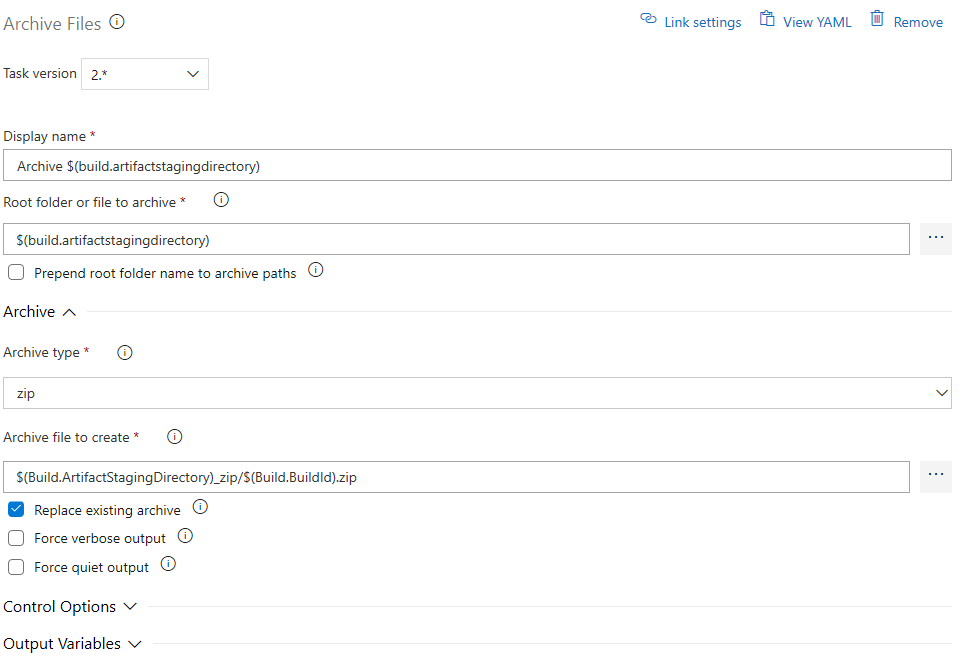
The name of the zip archive is the Build ID by default but can be changed at your needs.
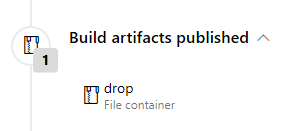
The last task in the build pipeline is the artifact publishing:
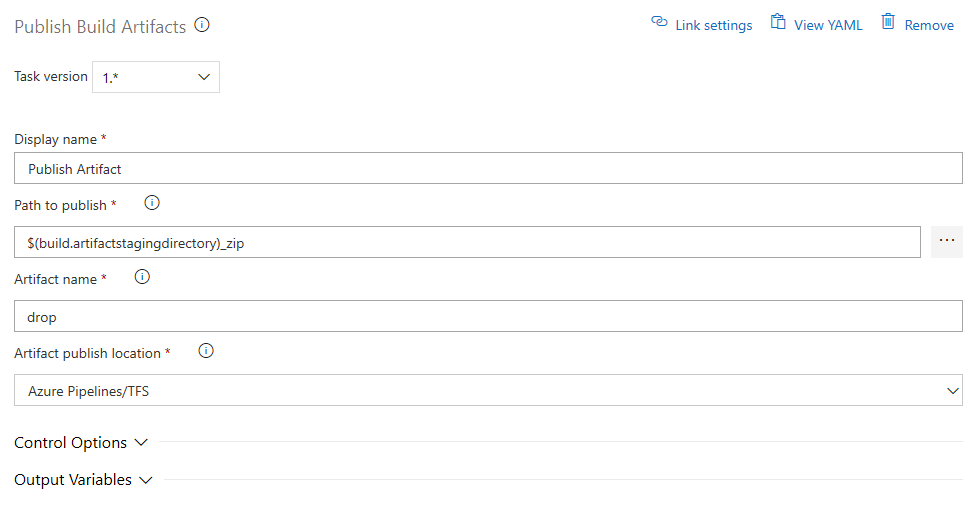
Please note the changed path to publish in the archive and publishing task. It has be changed to $(build.artifactstagingdirectory)_zip, to not include the other build output files.
If the build is configured, you can queue an execution and check if the published artefact contains the zip file:
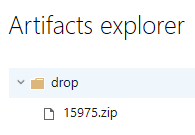
The drop shall contain one zip file:
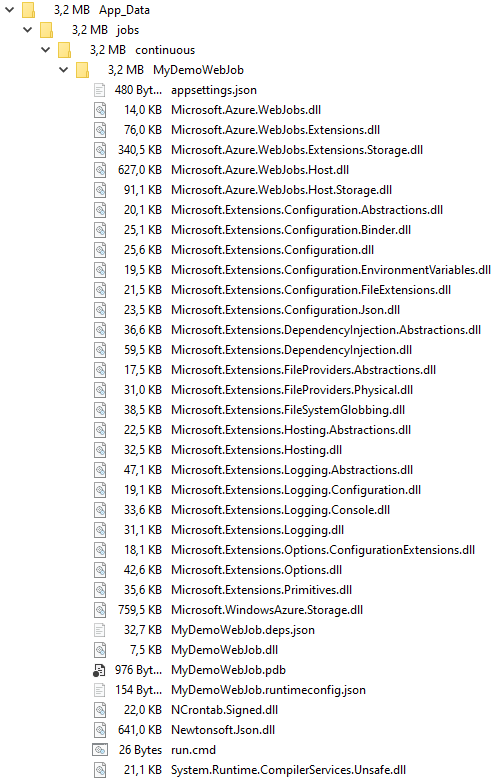
The created zip file shall have the following content:
If everything looks good, that artifact can be the starting point of our WebJob release.
So, we create a new release pipeline in Azure DevOps and connect that pipeline with the artifact of our build. Then we can us a default Azure App Service Deploy task to publish our web job to the Azure App Service.
With this post we described how to use and deploy Azure WebJobs to run background operations. Off course you could use other technologies to run such tasks like docker containers or Azure functions. For us, the WebJobs fit nicely in our CI/CD concept and have been accepted as a stable Azure technology with a large user base.